Easy, Profitable, and Idiot Proof Aquaponics: Ebb and Flow or Fill and Drain Media Bed Cheap Bell Valve Siphon

Moving Water
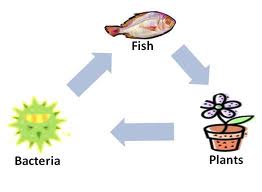
Moving water out of the grow bed in a media-based aquaponics system is at the core of how the system works. The concept is simple: fill the aquaponics media bed with water then drain the water back into the aquaponics tank where the fish live. This filters and aerates the water for the fish and delivers nutrients and water to the plants.
Inspiration
Solving The Problem
The problem of actually moving the water has been solved with a variety of contraptions that work to varying degrees. The bell valve siphon is by far the most reliable solution and has no moving parts.
There have been just as many renditions of DIY (Do-It-Yourself) and commercially available bell valves as there have been other solutions. Since this is Easy, Profitable, and Idiot Proof Aquaponics, designing a DIY version of the bell valve that anyone can make and use is of the utmost importance.
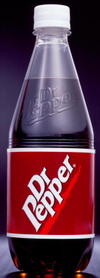
The video is the primary inspiration for the design that is based on a plastic 20 ounce Dr. Pepper bottle. The Dr. Pepper bottle was chosen for its shape, that I like to drink Dr. Pepper, and it fits perfectly in my bus tray grow beds.
Basis For Cheap Bell Valve
Making Dr. Pepper Bottle Bell Valve
There are five easy steps to making a bell valve out of a 20 ounce Dr. Pepper bottle.
- Remove the label from the bottle. If you are not able to remove all of the label, particularly the glued on parts, it doesn't really matter and won't interfere with its functionality.
- Cut the bottle along the lines where the cone shaped part meets the cylindrical (round) part. The bottles I use have three lines to follow. Trim the top of the cylindrical part when you're done to make it even if it's not already.
- Cut a triangular notch up to about halfway on the capital P then cut around the cone to make it about one inch shorter. This allows the cone part to fit into the cylindrical part of the bottle with about 1/2" clearance.
- Use a single hole punch to punch two rows of holes all the way around the cylindrical part of the bottle. The top row is about one inch in and the second row is below it closer to the edge.
- Use a Dremel tool or anything else you might find works to remove the top of the cap of the bottle. Make sure to only remove the top and leave the rest of it in tact.


Assembly and Installation
The bus tray grow beds have one inch pvc fittings with a small piece of one inch PVC pipe in the fitting inside the bed. The PVC is thin wall which the cap of the Dr. Pepper bottle (and any other regular plastic soda bottle) fits in. Here are the assembly and installation instructions.
- Remove the cap from the Dr. Pepper bottle.
- Press the cap, upside down, into the one inch PVC pipe inside the grow bed.
- Screw the cone-shaped part of the bottle into the cap.
- Place the cylindrical part of the bottle over the cone-shaped part.
- Fill the grow bed with media. Make sure none gets under the cylindrical part.
How It Works
If you've never seen a bell valve siphon work, check out the video and other videos on the Internet to see the many examples in operation. What basically happens is as follows.
- The grow bed fills with water
- The water goes over the cone-shaped part then down the pipe. This provides some restriction to help get the siphon started.
- The plumbing before the three 90 degree fittings fills with water which gets the siphon going.
- The grow bed drains down to the holes punched in the cylindrical part. The holes allow air in which breaks the siphon.
- The cycle repeats.